
This article provides a quick overview of how to use the Klangio Transcription Plugin to convert audio into unquantized MIDI, supporting multiple instruments.
What is the Klangio Transcription Plugin? #
The Klangio Transcription Plugin uses state-of-the-art AI to:
- Convert audio into unquantized MIDI
- Identify and separate multiple instruments into individual MIDI tracks
- Provide a streamlined workflow that blurs the boundaries between audio and MIDI
It’s ideal for musicians, producers, and creators looking for a fast and accurate way to turn recordings into editable MIDI.
Requirements #
- An active internet connection – transcription happens in the cloud
- Acceptance of Klangio’s Terms & Conditions
Download & Installation #
Download #
You can download the plugin installer from:
- klang.io/transcription-plugin
- Or via your Klangio Account Settings
The installer includes both:
- A VST3 plugin
- A standalone version
Compatible with all major DAWs.
Installation #
- Run the installer for your operating system (Windows or macOS).
- The VST3 will be placed in your system’s default VST directory (automatically detected by your DAW).
- The standalone version can be opened like any other application on your computer.
Basic Operation #
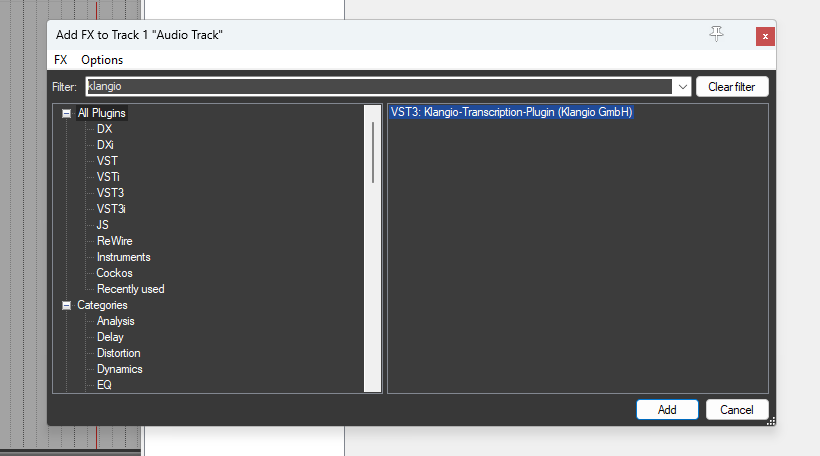
Opening the Plugin #
In your DAW:
Load the plugin into a track like any standard VST3 instrument. It should appear in your plugin list automatically.
Standalone Version:
Launch the app directly on your computer.
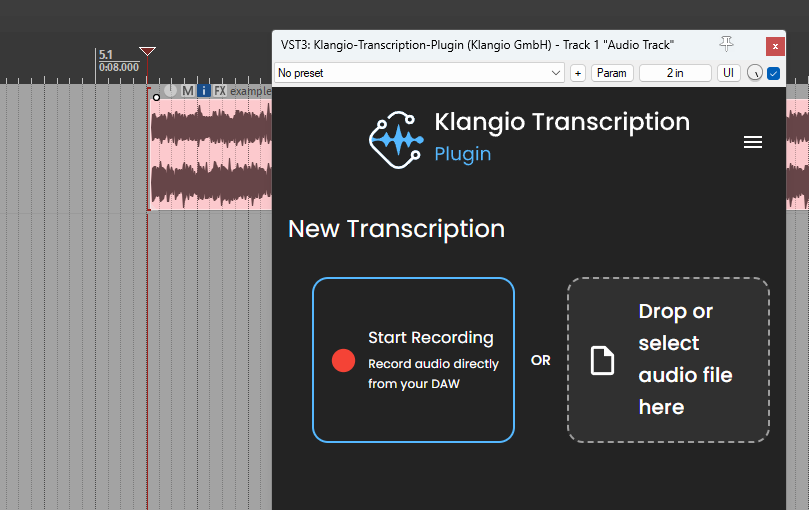
Recording or Importing Audio #
To begin transcription, you can either:
- Record audio directly within the plugin
- Drag and drop an audio or video file into the plugin
Note: Files must be between 5 seconds and 15 minutes in length.
Recording Audio #
In Your DAW (VST Version) #
The plugin captures the audio output of the track it’s loaded into.
Tip: To transcribe your entire DAW output (i.e., everything you hear), insert the plugin into your Master Track.
Steps to record:
- Load the plugin into the desired track (must contain the audio to transcribe).
- Place the DAW cursor at the start of the audio item.
- Press Record in the plugin.
- Hit Play in your DAW.
- After recording ends, click Stop.
- Preview your recording. If satisfied, click Transcribe.
In Standalone Mode #
The standalone version records microphone or line-in input.
💡 Workaround: To capture computer output, place your mic near your speakers.
Steps:
- Connect your instrument or position your mic near the sound source.
- Open Audio Settings (top-left or top-right menu) and select the correct input.
- Click Record – recording starts immediately.
- Click Stop when finished.
Drag & Drop Audio #
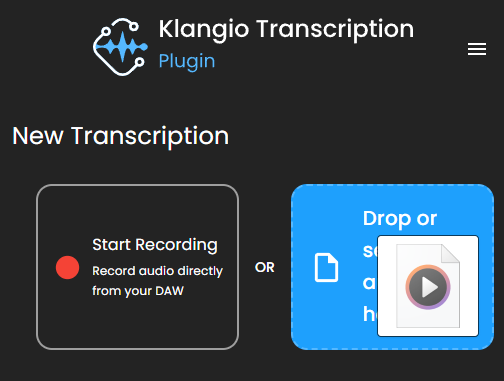
Instead of recording, you can:
- Drag & drop audio or video files directly into the drop zone (next to the Record button)
- Or click the drop zone to manually browse your files
Supported file types include:
.wav,.mp3,.aac,.flac.mp4,.movand more
Transcription #
The plugin can currently detect and transcribe the following instruments:
- Vocals
- Guitar (clean)
- Piano
- Bass
- Drums
- Strings
- Winds (brass & woodwinds)
- Synthesizers
If none are detected, you’ll receive:
“No instruments detected.”
Try a different audio file in that case.
💬 We welcome your feedback! Click the Support button to suggest new instrument types.
MIDI Preview #
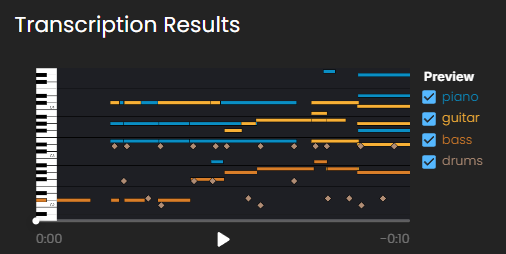
After transcription, you’ll see a pianoroll preview of the MIDI output, with playback options.
Features:
- Play/Pause at the bottom center
- Scrub the timeline
- Toggle visibility/playback of instruments on the right
⚠️ The preview uses basic instrument samples – the final result will sound much better when loaded into your DAW with virtual instruments.
Exporting MIDI #
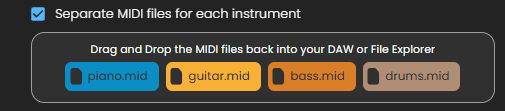
Once you’re satisfied:
- Drag & drop the MIDI files from the plugin into your DAW.
- Choose between:
- Single instrument MIDI – one track per instrument
- Multitrack MIDI file – all instruments in one file (DAWs will prompt to separate tracks)
Good to know:
- MIDI is unquantized, preserving timing from the original audio
- Use your DAW’s quantize function if needed
- Note velocity is not detected – you can adjust it manually in your DAW
Klangio Studio Pro & Account Settings #
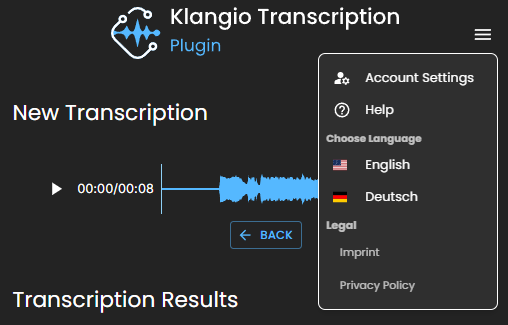
Change the Language #
Click on the burger menu in the top right corner to change the language of the plugin.
Subscription Required #
To fully use the plugin, you’ll need a Klangio Studio Pro subscription.
Steps to upgrade:
- Click Upgrade in the plugin
- Log in or create a Klangio account
- Complete the subscription process
Adding Your Device #
After subscribing:
- You’ll be redirected to plugin.klang.io
- Add your device ID with a few clicks
- You can also remove old devices from your account
Up to 3 devices can be connected per subscription
Account Management #
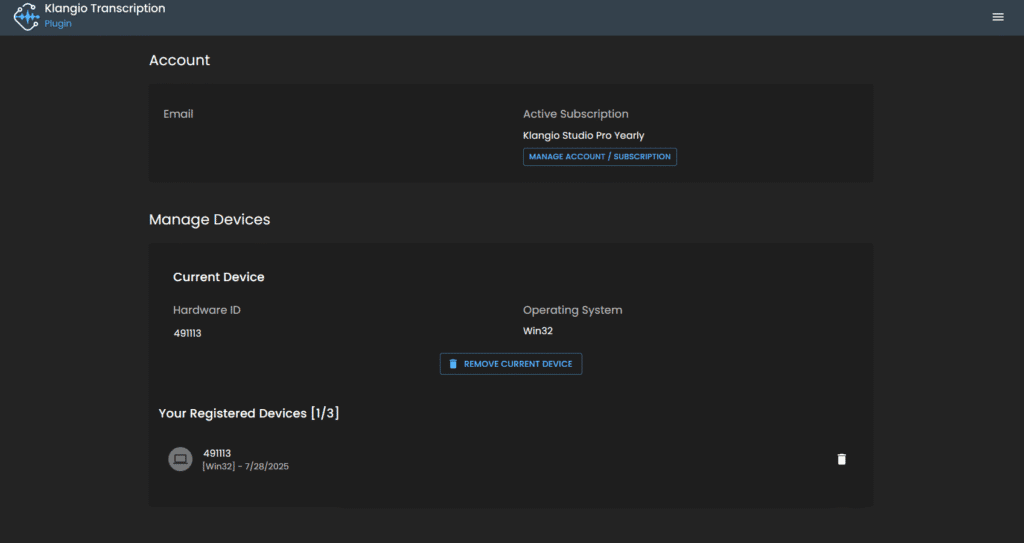
Visit plugin.klang.io, or click on “Account Settings” at the top right corner to:
- Change account details
- Cancel your subscription
- Add and Remove Device IDs
- Delete your account
⚠️ Cancel your subscription before deleting your account to avoid billing issues.
Known Issues #
Recording too slow (Windows) #
If audio recording is delayed:
- Restart your computer
- Still having trouble? Contact us via the Support button in the plugin
Distorted Electric Guitar #
Currently, only clean guitar tones are supported. Transcriptions of distorted guitars (e.g., metal/rock) may be inaccurate.
MIDI Drum Preview Sounds Off #
The drum playback in the preview may sound incorrect.
To evaluate transcription quality:
- Export the MIDI
- Load a virtual drum instrument in your DAW
Related Tools #
Try Klangio’s web apps for additional features:
- Convert audio into sheet music or guitar tabs
- Use Klangio Transcription Studio for a browser-based preview of transcription quality
→ Try it free at klang.io


